Wednesday, January 31, 2018

Sauron Costume DIY For Less than $25

Apparently schools have gotten a bit less parent friendly since my kids were in. A friend's kindergartner wanted to dress as Sauron (the bad guy from Lord of the Rings) for "Dress Like a Book Character" day at school. This whole day seems like a big undertaking for families with small children. Apparently my friend thought the same thing which is why she enlisted my help. 
I started out with this toy Army helmet from the dollar store. ($1)
The cloth cover was just glued on. The plastic surface was so smooth that the glue pulled off with very little coaxing. 
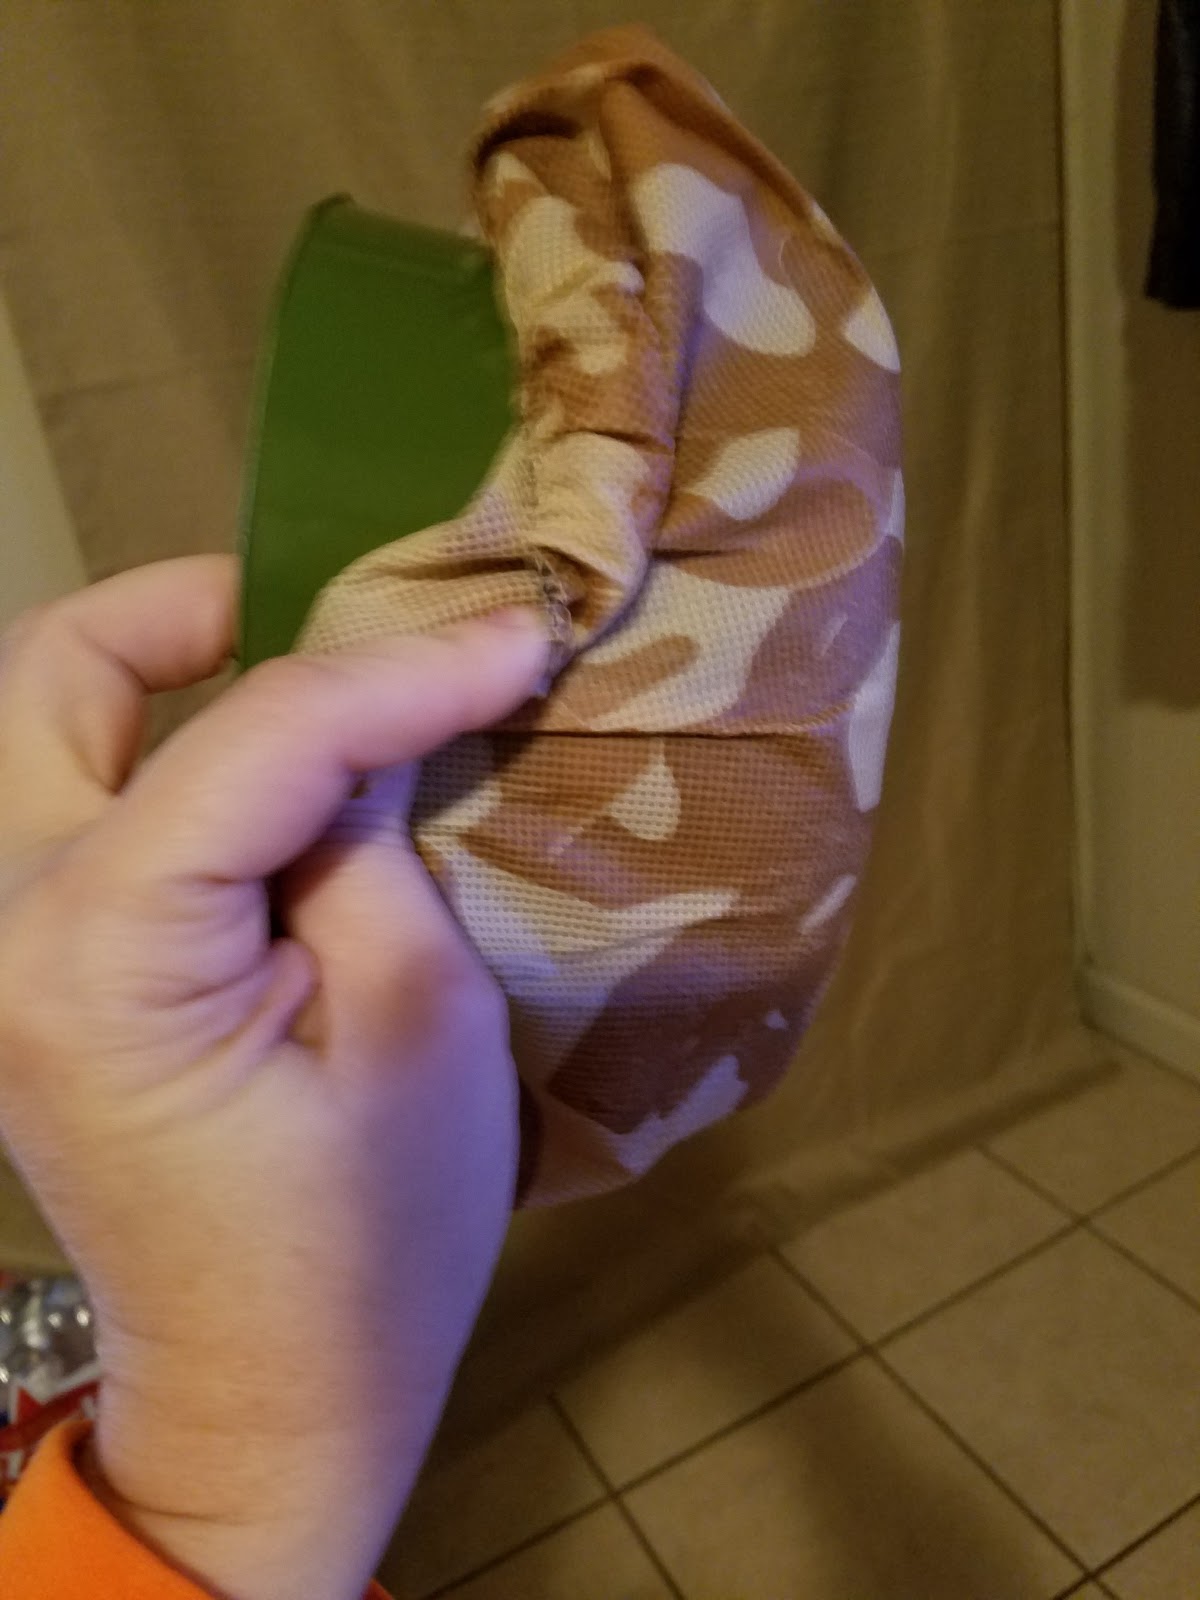
 Once the cloth was removed, I cut the bent out rim off with scissors.
 I got 2 sheets of fun foam from Michael's for .99 each ($2)
 I started out with the nose piece. I folded the foam in half and cut a rough shape, then trimmed it down.
I have a foam head that I used as a reference to line up the eyes etc. Using chalk I outlined the helmet around where the eyes would fall and cut out the area with scissors. I cut out 2 more shapes from the fun foam as you can see below. I glued the foam together making the nose piece bump out a bit. Then glued them to the helmet.

Because the helmet is so smooth I applied hot glue to tack things in place then I used E6000 glue because it's a lot stronger bond. For everything not touching the helmet I just used hot glue. ( I already had both glues, so I didn't count it in my final price)
 Two more pieces were cut to finish off the eyehole area.
 Then two more large pieces to cover the sides of the face.
 I cut slits in the side...
 ...then overlapped and glue them together to make it shape around the helmet.
 It's starting to look like something finally.
 More slits around the top.
 These I cut wedges out of a little bit at a time, pulling them together to check until they fit just right.
 These I glued together at the raw edges. Then I glued them to the helmet.
 I added a fairly tall piece that covered the back of the helmet, but just the length of the helmet. Then went through the same process of cutting wedges into the foam and gluing them. The top had a big open spot which I covered in a circle of foam. I added a V to the front to add some depth. I popped it out a bit. You'll see why in a bit.
 I gave the outermost face pieces a more character with some cuts. I didn't have them exactly even and in hindsight I would have paid more attention. I adjusted it a little later on by gluing one side up a little higher. It did make the mask pull a little to one side, but it wasn't too noticeable.
 Here is where the V being popped out comes into play. I took some cardboard from a clothes iron box. Using my metal ruler I bent the pieces of cardboard around it to make a straight crisp (as crisp as cardboard gets) fold.

The ruler also acted as a way to make the blades the same width. I wish I'd taken a picture of this step. The blades are each 2 rulers wide with a fold in the middle. I made 4 of these.

On the folded side of  the cardboard I cut an arch then glued the edges of the arch together. On the opposite side I cut another arch in the same direction about the shape of the helmet.

I tucked the first blade into the V above the nose then eyeballed the rest of them place them evenly around the top.
 I made some eyebrow shaped pieces, using a lid for a pattern. These were glued above the eyes, to hide the jagged helmet a little better.

I then added swirls of hot glue on the outer four pieces of the mask. Not the nose piece or any of the top pieces.
I used a Rubbermaid tote as a paint booth, because I rent and didn't want to get any backspray on anything. Also, it was sprinkling out that day. I sprayed quickly the brought it inside to dry with a fan. Probably not the best idea, but I had limited time. 

 This is the paint I used. It's one of my favorite things. It adds texture and makes it look pretty realistic. ($7)


 Using a paper towel I applied this Rub 'n Buff in ebony in a few spots. A little goes a long way, so start small. ($3 I had a 40% coupon at Hobby Lobby)

This gave the helmet a weathered look. I think it came out pretty awesome!
 I found these knee pads at the dollar store, when I was getting the helmet. ($2)

I used chalk to trace around a cake pan on each knee pad, to make this shape.
Thn cut at the chalk line...
...to make these 2 pieces. 
By the time I got to the shoulder pieces I had forgotten to take pictures until it was done. 

For the spikes I cut long thin triangles and glued the outer edges together leaving the upper third unglued. Which gave me a sort of arrow shape. I made 10 arrows.

For each shoulder, I glued the two pieces of knee pad together as you can see below. I then glued the arrows to them, with the glue seam facing down.

Like the mask I spray painted then distressed with Rub 'n Buff.
The arrows kept bending so I ran a bead of glue down the arrow head part to make them a little more sturdy and straight.
 I glued the shoulders onto a t-shirt in the kiddo's size ($4 yay Walmart)
 JoAnne's had a 60% off coupon. I found this stretchy metallic black fabric for $9.99 a yard . I got 1/2 yard and cut that in half lengthwise. ($2 for 1/2 yard of fabric with coupon).

I had some heavy duty sticky back velcro from a different project. I attached a long strip across the back of the t-shirt then just stuck the fabric to the other sticky side, making pleats as evenly as possible. I pressed on it pretty hard, to make sure everything was attached well.
Final Price
1 Helmet                      $1
2 Sheets Fun Foam      $2
Spray Paint                  $7
Rub 'n Buff                  $3
2 Knee Pads                 $2
1 Shirt                          $4
1/2 yd Fabric               $2
_____________________
Total                           $21 

Azafran Shrimp and Spinach

I've been on this keto kick like the rest of the nation. So far I've lost 15 lbs and no telling how many inches. My pants are literally falling off. My biggest problem has been missing my rice dishes. I had a love affair with Paella, but it was no good for me. So, today I decided to try something with similar flavors. It was delicious! This recipe unfortunately contains MSG. I should've read the seasoning packet beforehand. If you are a strict Keto-er there are lots of recipes to make your own version of Sazon Goya Azafran (the seasoning packet).
I didn't think to take pictures or measure anything until it was almost done, so I'm going to wing it. 

To start I put about a cup of chicken broth in my biggest pan. then added about a quarter cup of heavy whipping cream and added a whole bag 12 oz of frozen spinach, and probably a quarter cup of chopped fresh cilantro. I heated this over a medium flame stirring and breaking up the spinach until it was all melted.  I then added an entire packet of Sazon Goya Azafran seasoning to the pan and gave it a good stir. 

I threw in a couple teaspoons of sun-dried tomatoes and grated about a quarter cup of parmesan cheese over the top. Then salted to taste and added a dash of my homemade hot sauce (this stuff is potent)


The last step was to throw in a pound of peeled, de-veined shrimp and let them cook until they were pink and curled. 

Maybe next time I'll double the liquid and make it a soup.

On the bottom left, you can see the packet of seasoning I used. You can find it in almost any grocery store with the other Hispanic foods. It comes in a small box. 

Azafran Shrimp and Spinach

Ingredients
1 cp chicken broth
1/4 cp heavy whipping cream
12 oz bag frozen spinach 
1/4 cp chopped fresh cilantro  
1 packet of Sazon Goya Azafran seasoning 
2 tsp sun-dried tomatoes 
1/4 cp grated parmesan  
salt to taste (optional)
dash of hot sauce (any brand that only contains peppers, vinegar and salt)
1 lb peeled, de-veined shrimp

Put the first 4 ingredients in a large pan. Cook over medium high heat until the spinach is thawed. Add the seasoning packet and give everything a good stir. Throw in the sun-dried tomatoes, add more if you like (3 carbs per 2 tsp), and grated parmesan . Salt to taste. Add a dash or two of hot sauce or skip this step if you don't like spice. Add the shrimp and continue cooking until they are pink and curled. You could double the liquids and seasoning packet if you want a soup. Throw a little parmesan on top when serving, because who doesn't like extra cheese.


Subscription Meal Box Review - Home Chef


Subscription Meal Box Review - Home Chef

Round 2 of my meal box reviews is Home Chef. Honestly, it's a little cheaper, but the food was a little bland for my pallet. It wasn't packaged as well and FedEx left my box on my doorstep instead of at my apartments office. I live in the ghetto, so luckily it was there when I got home. Also luckily it wasn't too hot out.


Everything was separated by baggies, which probably allows them to use smaller boxes, but I really liked those boxes.
Home Chef did supply a nice little binder for all of the recipe cards, which was a nice surprise. I 3 hole punched my Hello Fresh cards and added them to the binder as well.

My first recipe in this box was Baja Fish Tacos with Sriracha Slaw and Pickled Onion.
The slaw was much better in this one. No bitter cabbage. I had trouble with the tempura batter on the tilapia though. Several times in the recipe it said to make sure the batter was thin, which I did and I think in a deep fryer it would have come out great. Pan fried, however, it stuck to the pan and I ended up scraping the batter off the pan and just setting it in the taco with the fish. These were tasty and filling, but nothing really stood out about them. If you are ever in Little Rock and want some REALLY good fish tacos, the Flying Fish is the place to go.

Monday, May 22, 2017

Subscription Meal Box Review - Hello Fresh

Subscription Meal Box Review - Hello Fresh

I don't know why I haven't tried these subscription meal plan deals before. Probably because my sister told me to. Honestly I think the price seemed a little daunting, but I actually did the math and it makes so much more sense than what I had been doing. I did a little digging and found coupons and discounts for most of these boxes. Woohoo! I started out with Hello Fresh because, I found a Groupon deal for $30 off my first box.

I'm going to pass on even more savings to you. By using this link you will recieve $40 off your first box. www.hellofresh.com/?c=FRSTER

Here's what came in the box.


The three brown boxes each contained the ingredients for the meal. The large box was packed very nicely with no worry of the food going bad. There was insulation on the bottom, the meat, two large (reusable) gel ice blocks directly on top of the meat then the three ingredient boxes on top of the ice. Bonus, it's a nice solid box that I will keep for moving in a couple of months. 

The first meal I prepared was the "Blackened Catfish with Blistered Veggies and Roasted Potatoes. I was kind of sceptical about making 2 meals out of what was given, but it was more than filling enough. This was dinner on Friday night. I had the exact same thing for lunch the next day. 
The only things not included in the box that this meal called for were salt, pepper, and oil. The cilantro looked like it was picked very early, it was very light in color, but it tasted fine. I only deviated slightly from the recipe by only using half of the onion in the blistered veggies. A whole onion just seemed a bit of overkill. 
This was a great meal, delicious, easy and quick. I would have wasted more than half of a lemon, and half of an onion, but the steak recipe also called for lemon, my roommate needed onion for something and I made my favorite citrus rice later on in the week. So, no waste in this box.

Meal 2 was the Pork D.I.Y. Dumplings with Quick Pickled Slaw and Soy Dipping Sauce.
Another delicious, easy meal. 
If you've never worked with won-tons before it could take a little experimentation. My suggestion is to have a large dry surface so none of your won-tons touch. Using water to turn the flour on the won-ton into a glue of sorts can be difficult, because it will soften the won-ton and cause tears. My approach is to put water one won-ton at a time, and quickly seal it. 
These don't have to be sealed perfectly, if you had something melty like cream cheese in them you would have to be more careful. 
The cabbage I received for the slaw was very bitter, but once I made the dressing it tasted just fine, and it was very pretty. I love colorful food. The soy dipping sauce was the perfect accompaniment. I'm going to file that recipe away for later.  

I did waste a little of the slaw, it was just too much.  There were more than double the number of won-ton wrappers needed so, I put them in the freezer to make crab rangoons later. 

The final meal in this box was the Lean Green Steak Machine with a Mint Chive Dressing and Veggie Succotash. I think this was my favorite of the three. I love red meat, and those big chunks of veggies, including two of my favorites, asparagus and zucchini. Yum. 
Unfortunately, I was a bit sidetracked that day and forgot about taking pictures until I had already started eating. I never would have thought to put chives and mint in a dressing, but it was absolutely great. 

Long story short, this was a great experience and well worth the $30 I paid. Once I try a few more boxes I may return to this one on a regular basis.